Share, print and Story
(YouTube video link: 8. Share Print Story - YouTube)
Share
You can share the custom views of the map you created by simply clicking on Share/ Print button at the top right corner of the Map Viewer.
There are three ways to share your the RaPP Map view with others:
-
Click the Share button, copy the given URL (shown in the first text box) to the clipboard and paste it into an email which you send to the recipient. They can click on it in the email or paste it into their browser to see the same view as you. Note: Copying the URL will preserve the data layers, zoom levels when opened by other users. If local files are added to the map, the share link will not include those
-
Click the Share button, click Advances options, copy the HTML fragment and paste it into an HTML file, which you then make available to the recipients. When the recipients display your web page, they will see the RaPP Map view within that web page.
Note: This will show the data you have loaded from a local file. To share a view of your data with others, you must first publish it to the web somewhere with a URL, and then load it from there.
-
Take a screenshot and email it as an image (see your OS instructions on how to take a screenshot). This will share all information, even if loaded from a local file or URL.
Print
Click Download map (png) to download the map in .png format. You can also check the print view before downloading by clicking the show print view.
Story
You can create simple animations using the Story functionality by adding different data layers, changing the zoom levels etc. at different stages of the Story. Once completed, Stories can be shared following the steps under Share / Print feature.
Export
Export is not currently working and will be fixed in the next Terria update.
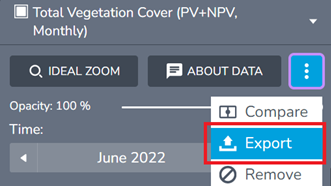
The Export function enables you to download a GeoTIFF of a single time period from the Total Vegetation Cover for a custom extent that you select from the RaPP Map view.
Click on the three vertical dots and then the Export tool.
Export - download a Geotiff of the area shown on the map
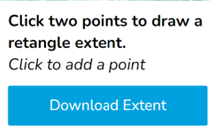
The window Figure 43 appears. Click on the map twice to draw the rectangle. Then click Download Extent.